Saturday, April 25, 2009

Working with Water Slide Decals

I've been thinking about decals lately, mostly due to having to paint so many Blood Ravens chapter symbols on my growing army. It's a bit of a pain to get them consistent, and somewhere along the line I had enough people ask me if they were decals to actually make me want to try decals.

The problem, as most of you who have tried to use decals on space marine shoulder pads know, is that flat decals don't sit well on aggressively curved surfaces. From various other tutorials around and about the interwebs I discovered "Micro Set" decal solution. Basically, it softens the decals so that you can smoosh them into position, more or less. Its counterpart, Micro Sol, is even more effective at softening. The fellow at the hobby store told me that if Micro Set does the job, then there's no need for Micro Sol. They were out of Micro Sol anyway, so I bought what they had. I've been testing it with decals on Mr. Missile Launcher here, and the results have been encouraging. Basically, you brush Micro Set on the shoulder, place the decal, then brush more Micro Set over the decal. A few minutes later the decal should be soft enough to tap down with a moist towel into some semblance of flat. I've had to make multiple passes with Micro Set over the highest part, so I might pick up a bottle of Micro Sol and see how that works.

After the first try I was surprised to see the first decal dry up and fall off the model! Maybe I wet it too long and it lost all its adhesive. For try #2 I put some matte varnish over the decal to try and "glue" it in place and hopefully obscure the edges a little. Big mistake! The varnish (Vallejo Game Color matte varnish) clouded the decal significantly. Spot testing the varnish elsewhere didn't cause the clouding. With the current run I wet the decal with a cloth from the back, hopefully retaining as much of the adhesive as possible.

Once I get these things to wrap around a should pad properly the next step is to print my own and see how they work. I bought a Testors decal printing kit (a paltry $10) and have been experimenting with the free image processing software Gimp to get exact measurement printing. Gimp 2.4 was terrible at it, but Gimp 2.6 is wonderful. Once I get a reasonable decal sheet of Blood Ravens icons I'll post them here. I'm a little concerned that the spray sealer that covers the printed decals will stand up to the rigors of Micro Set, but I'll find out in time.

Friday, April 10, 2009

Masking - No Salt Required

Salt masking has been all the rage lately, mostly thanks to giganticdark's amazing Space Marine. The technique requires multiple passes with a double action airbrush, which can be something of an inconvenience if you don't actually own one. This tutorial describes how to use a brush-on masking medium to achieve natural looking wear. This is a very basic tutorial, so please experiment and see how you can alter it to produce more complex effects.

The key is this stuff: Vallejo Model Color Liquid Mask. It's a water soluble acrylic that dries to a gummy consistency like rubber cement. The key here is that when it's set it is easy to remove, revealing whatever color was under it.


Step 1: Deepest color. I started with a Rhino that I had basecoated Red Gore. To the area I planned on weathering I painted Reaper Shadowed Steel (basically boltgun.) Viewing the result, I think I would go with a brighter metallic next time, like Chainmail. After the steel dried I applied a very diluted wash of VGC Orange Fire, the brighter of their two oranges, to give the impression of corrosion. Let this coat dry thoroughly before continuing.


Step 2: Apply the mask. Put some of the mask on your pallete, pick a bit up with a coarse brush and then tap the mask lightly on the areas you want to reveal when the process is complete. Try to keep the pattern of application somewhat random while controlling where you want to wear to show most. It's much easier to see when dry, so don't be afraid to apply a little, let it dry, assess the pattern and then apply more as needed. I haven't tried this myself, but the "toothbrush spray" technique may work for random splatter patterns. Let the mask dry thoroughly before continuing.


Step 3: Match the base color. Paint over the mask and wear color with the base color again. I know I sound like a broken record on this, but multiple thin coats make for smooth paint jobs, not thick paint globbed on in one coat. Let each coat dry before applying the next, until the wear area roughly matches the rest of the paint color.


Step 4: Remove the mask. Use a colour shaper, pencil eraser, or a stiff brush that you have an irrational vendetta against and gently brush the mask off the area. It's gummy and will pill up, but it comes off eventually leaving the wear color from step 1 revealed. If you get it on a brush, soap will do a pretty good job of removing it.


That's it! A low sodium technique for natural looking wear. I'm sure this group can figure out interesting variations to get the most out of this. Show me!

Monday, April 06, 2009

My Level 18 Tourist has GDSM and Magicbane

This one comes from the "if you have to ask..." department.

I'm a long time fan of the game Nethack. Even before it was Nethack, I was busily souring my first stab at higher education playing its predecessor hack. It took me something like 17 years to win it for the first time. Yes, I kept coming back for that long, and I'm still coming back.

Currently, I have a very unlikely game going... a tourist in Gehennom with basically a full ascension kit in hand. I don't have the Book yet, but the Bell and the Candelabra are mine. As you can see from the screenshot, I have nearly every intrinsic. Currently, I am on a very low level (or high, depending on how you think of it) in a locked room doing the "cursed scroll of genocide" with nurses thing to gain max hit points. I still have two wands of wishing (wow didn't always mean World of Warcraft, kids!) that can be charged again with the Platinum Yendorian Express Card. I can hardly believe I'm saying this, but I may just ascend a tourist.

And for the uninitiated, GDSM is "gray dragon scale mail" and Magicbane is a unique artifact athame.

Thursday, April 02, 2009

Blogger Tip: Wrapping Text Specific to Multiple Images

One thing I've struggled with in my blog is the ability to post multiple images and have text roughly aligned with each image. That way I can actually write about the image that's next to the text.

It's going to take some html changes. Don't be scared. You can do this.

If you don't know what html is, don't worry. It's the language that a web browser (Internet Explorer, Firefox, etc.) uses to know where and how to put stuff on the page you are viewing. Html "tags" tell when to start and stop a particular format. The starts look like <this> and the stops look like </this>. Got it? Good, because you don't need to know any of this. Read on.

Here's the quick list of what we're going to do:
  1. Load an image into the post
  2. Add some text to go with the image
  3. Add a snippet of html before the image
  4. Add a snippet of html after the text
So start by composing a new blog entry and import an image into it. Just for grins at this point, click the "Edit Html" tab in the upper right of the compose window. The code for the image is a big scary block of html that starts with <a onblur="try... and ends with ...border="></a>. It should be about 5 or 6 lines total. Again, you don't need to understand it... you just need to be able to find the <a> at the end.
Okay, so switch back to "compose" mode (upper right tab) and add some text to the post. Now, switch back to "Edit Html." If you entered your text to the right of the image if should show up after the </a> part. That's good. That's what we want. Now find the end of your text. That should be pretty easy to do. Got it? Great. Guess what... we're half way there.

Okay, here's the fun part. Go back to the html and find the beginning of the image code again. Right before the <a paste this code:
<table style="border: medium none ;"><tbody><tr><td valign="top" width="100%">
Good, now go to the end of your text and paste this code in:
</td></tr></tbody></table>
Good. Now go back to "compose" mode and look at it. Okay, so it's not so impressive.... yet. The trick of this is that those code blocks can be repeated to get the text to stay with the relevant image. Each separate picture and the associated text is surrounded by its own "table" tag. This way, the browser knows to keep them separate. The post immediately below this one is a good example of two pictures with associated text.

Here is the updated post html, the parts I added are red. Since there are two pictures there are two "table" tags included, as you can see below:
<table style="border: medium none ;"><tbody><tr><td valign="top" width="100%"><a onblur="try {parent.deselectBloggerImageGracefully();} catch(e) {}" href="https://blogger.googleusercontent.com/img/b/R29vZ2xl/AVvXsEjoSWLwihwZWVfFdR_DapsP5f3wDUbiWr0t_LeV3-g3a2OUf4G1rmRD4IKmcPON4WyrOjBmpKTtJaUArTPHFxwFUTVYixn_o_DVPgv6ohDcla-fUPls9GS7GQd6T3AbyvYzoGIM/s1600-h/wip1.jpg"><img style="margin: 0pt 10px 10px 0pt; float: left; cursor: pointer; width: 320px; height: 243px;" src="https://blogger.googleusercontent.com/img/b/R29vZ2xl/AVvXsEjoSWLwihwZWVfFdR_DapsP5f3wDUbiWr0t_LeV3-g3a2OUf4G1rmRD4IKmcPON4WyrOjBmpKTtJaUArTPHFxwFUTVYixn_o_DVPgv6ohDcla-fUPls9GS7GQd6T3AbyvYzoGIM/s320/wip1.jpg" alt="" id="BLOGGER_PHOTO_ID_5319591784571512354" border="0" /></a>Hmm. The title sounds like "Kibbles and Bits"... Menites and Kans, Menites and Kans, I'm gonna get me some Menites and Kans.

But anyhoo.... I converted a Killa Kan from various bits, and I think he turned out okay. Meet Stompy and Chompy. I think the rationale behind Chompy's name is self evident, and of course Stompy is up on one leg. The third in the set is tentatively named "Clyde," named for the ghost in Pac-man who broke the rhyming pattern. I don't know what Clyde will be, but he won't be a stock Kan. Anyone care to share ideas?</td></tr></tbody></table>
<table style="border: medium none ;"><tbody><tr><td valign="top" width="100%"><a onblur="try {parent.deselectBloggerImageGracefully();} catch(e) {}" href="https://blogger.googleusercontent.com/img/b/R29vZ2xl/AVvXsEjW7BKuVUUoiBG7FlpdUc-sMU92_6vsgFNQ1TWwqvwK2Of2xQ15z646NKEKaUf3IGz8KIAMx1wIIQrIGlthF-fFf8TMl-9BnL5ykODbw4rvj02tffVjuXqF2gvsgNcR2wvpwfzL/s1600-h/wip1.jpg"><img style="margin: 0pt 10px 10px 0pt; float: left; cursor: pointer; width: 320px; height: 176px;" src="https://blogger.googleusercontent.com/img/b/R29vZ2xl/AVvXsEjW7BKuVUUoiBG7FlpdUc-sMU92_6vsgFNQ1TWwqvwK2Of2xQ15z646NKEKaUf3IGz8KIAMx1wIIQrIGlthF-fFf8TMl-9BnL5ykODbw4rvj02tffVjuXqF2gvsgNcR2wvpwfzL/s320/wip1.jpg" alt="" id="BLOGGER_PHOTO_ID_5319593172141889330" border="0" /></a>Also up are some models from the game Warmachine. I play the "Protectorate of Menoth" faction, and I absolutely love the models in this game. I have a standing challenge for a 500 point fully-painted game around May 1, so I'm planning what models need painting. My opponent will almost assuredly field Khador, so I'm in for a first-class whuppin'.</td></tr></tbody></table>
That's it! Go to town and let me know if it works/doesn't work for you or if you've found a better method to accomplish this.

Wednesday, April 01, 2009

On the table: Menites and Kans

Hmm. The title sounds like "Kibbles and Bits"... Menites and Kans, Menites and Kans, I'm gonna get me some Menites and Kans.

But anyhoo.... I converted a Killa Kan from various bits, and I think he turned out okay. Meet Stompy and Chompy. I think the rationale behind Chompy's name is self evident, and of course Stompy is up on one leg. The third in the set is tentatively named "Clyde," named for the ghost in Pac-man who broke the rhyming pattern. I don't know what Clyde will be, but he won't be a stock Kan. Anyone care to share ideas?

Also up are some models from the game Warmachine. I play the "Protectorate of Menoth" faction, and I absolutely love the models in this game. I have a standing challenge for a 500 point fully-painted game around May 1, so I'm planning what models need painting. My opponent will almost assuredly field Khador, so I'm in for a first-class whuppin'.

Monday, March 30, 2009

My First Eight!!!

Since I discovered CoolMiniOrNot way back in '05 I have had the singular goal of getting an 8.0 score on one of my minis. Today I looked at my gallery and realized that I had one! The duel entry from Chicago Games Day '08 had been hovering in the high 7's for ages, but today it's at 8.0.

So why would this make me so happy? The miniature isn't any better looking at 8.0 than it was at 7.8. It still didn't win a trophy. I think the big deal is that I've always defined 8 as the "great" range for minis on CMON. To think that about 100 people think my mini is (on average) "great" is an encouragement. Golden Demon is a tough competition. To even think about competing against the likes Chris Borer, James Wappel and Vincent Hudon takes some cajones. It's easy to get discouraged, especially competing in categories like 40k single model.

The simple plan: Keep painting. Get better. Win a silver. Win a gold. Win a sword.

...someday

Friday, March 27, 2009

The Dollar Store = Kitbash Heaven

I have a confession to make... I'm frugal. Okay, maybe cheap is the right word. Either way, I've discovered in the past couple years how great the dollar store is for kitbash raw materials.

In case the term is new to you, kitbashing is taking something and disassembling/destroying it to get at its core components, then using those components to make something else. The toy section is especially handy, since a lot of the items have similar scale to wargaming. My BattleWagon shown here is a kitbash of a garden variety GW Ork Trukk, a dollar store steam roller toy and a dollar store Hummer Limo toy. Other bits from older GW models plus some styrene (used gift cards) were used as well. The big shootas in the front were originally the exhaust stacks from the steamroller.

The other Dollar Store item I really like is clocks. For only a dollar you get a wealth of cool gubbins like gears and springs and clear plastic disks. For Orks, all those fiddly little gears look great. I even used some broken gears to base my Grand Scrutator Severius last night.

Other Dollar Store items you might find useful:
  • laser pointer (true LOS!)
  • hobby paint brushes (for glue mostly)
  • craft sticks (tongue depressor sized or smaller) for wooden planks
  • plastic shot glasses for mixing 2-part epoxy
  • steel cookie sheets for carrying magnetized models
  • basing material (small rocks, spices, etc.)

Wednesday, March 25, 2009

Three Fails

1. Failed my "job" roll
My application that was supposed to go into production today wasn't correct. I'm scrambling to finish it now.

2. Failed my "parenting" roll
My five year old had been telling us that his pre-school class does "show and tell" so he had to bring something, typically a toy dear to him. It turns out that his class does no such thing, and this was just a sly attempt to take his favorite toys to school. The fact that it took three weeks for us to find out is the embarrassing part. Nice one, Jay.

3. Failed my "40k gaming" roll
I played a substitute game of 40k Saturday for a friend who had to cancel on someone. It was a 1500 point game vs. Space Marines. Since my friend plays Orks I took Orks too. The list I faced was that Salamanders character (Vulcan?) to 10 marine squads in rhinos, three Dreadnoughts, Three Predators (AC, 2xHB) and three Land Speeders. Ouch. I got destroyed. Granted, I had to scrounge to get to 1500 points, I've never played Orks before and I've never actually won a game of 40k, but I was still the optimist! Once he had nine kills points to my 3 we called it, roughly the end of turn 4. In honor of my Warboss' crushing defeat in the unstoppable grip of his Dreadnought I am painting my opponent a Warboss head to place under the foot of his Dread. In fact, I should pledge some sort of hobby favor for any loss I incur.

Wait, maybe I should make the "plain, blue police box" I owe someone first... (yes, I mean you.)

Sunday, March 22, 2009

Imperial Fists Land Raider Redeemer WIP 1

This one has been on the shelf for a few months awaiting completion, and I think I'm going to get it done this week. I don't know how I would have done this without an airbrush. Seriously, I'm on at least coat 10 of yellow on the multimelta gunner and it's only now starting to look reasonably smooth. One of the goals for this one was a painted interior, so I ended up painting in the middle of assembly. That was a new experience, but I think it turned out well.

This is headed for eBay fairly soon. I made Chronus and the gunner removeable so you don't have to field them if you don't want. The final piece will include an "on-foot" Chronus in addition to the Chronus shown in the pic, both converted to Imperial Fists.

If anyone is seriously interested in purchasing this before it goes on the block, shoot me an email.

Friday, March 20, 2009

Take Cover! Final


Facing superior firepower and running low on ammunition, this Blood Raven waits for the right moment to unleash boltgun fire on the enemies of the Emperor. I wanted to convey a sense that the cover was insufficient compared to the enemy, and hopefully the big glowing hole in the rock says that clearly enough.

I think this is the final product. Unless I find something glaringly wrong with it tomorrow then this is it. Thanks to all of you who suggested improvements. I really appreciate the feedback. It's interesting to note the difference in his right leg in terms of delineation of the kneepad, the lack of which was pointed out by Wienas. Both photos were taken in a light box with no direct light sourcing, and the darklining around the kneepad is far more visible in one pic than in the other. I'm guessing the camera was going through a little "red freak out" trying to figure out how to capture this. I didn't put the scorch marks Lord suggested, as I had envisioned that he wasn't right there when the hole was blasted in the rock.

Special thanks to Felix for the photography tips. These pics were f3.1 1/15 sec ISO 50. This is the first time I've been able to use the light box without pointing a light right into it. You, sir, rock.

The OSL was about as simple as it could be. I mixed some orange paint in with a great deal of P3 mixing medium and glazed it on in very transparent layers. It's pretty effective visually for the amount of effort. Damage on the shoulder pad is thin lines/spots of Reaper Bone Shadow with thin lines of skull white underneath. The key to thin lines is dilute paint and controlled brushload. Too thick and the paint gets chunky as you paint. If you pick up too much thinned paint on the brush it beads up or flows on the mini.

Like it? Give it a score on CoolMiniOrNot! http://www.coolminiornot.com/216976

Thursday, March 19, 2009

Take Cover: Almost Complete!

Nearly done! Almost every part of the mini got some work tonight, with only the boltgun and chapter symbol as big "to do" items before Friday night. I'm going to complete this one!

The armor was highlighted with VGC Blood Red, glazed on rather than hard edge highlighted. The shading for the armor was VGC Night Blue / VGC Red Gore. Using a blue in the shading layer is something Jeremie Bonamant Teboul discussed in his painting seminar in Chicago in 2007. I took some notes on it, and he posted them on his site.

The damage to the armor is Reaper Honed Steel (roughly GW Chainmail, but a bit more blue) tapped on, then black edges along the top of the damage. I then used red gore again to touch up the black to more controlled areas, then selectively glazed with GW Terracotta to soften the area and give the subtle impression of rust. The face is washed with Ogryn Flesh, then re-highlighted with P3 Midlund flesh and shaded with VGC dark fleshtone. The stones were based with Foundation Charadon Granite, then washed with several different washes to give a non-homogenous look. The glowing damage is skull white at the center and layered through yellow to orange to dark red.

Okay! I'll post final pics when I get this fellow completed!

Wednesday, March 18, 2009

My Photography Setup

As my CoolMiniOrNot gallery amply demonstrates, I've struggled with how to photograph minis for some time. I've read so many articles on the subject that I can't even remember if I'm doing what they say to do or what they say to avoid.

Whether it works well or not, here's what I'm currently using. It's a cheap and easy method if you have never tried mini photography before.

The white box thingy is a 12" photo light tent I purchased from Amvona on eBay. It's collapsible, but I never collapse it. It came with a few colored inserts, but I like just picking pieces of felt or using a printed paper with a color gradient as the background. The lights are an Ott light (on the right) and a cheap desk lamp with a compact fluorescent bulb from the dollar store on the left. The price difference is extreme, but the light quality difference is negligible. Seriously. The thing in front of the tent is a piece of foam from a Sabol army transport with a notch cut in it for my camera. Yes, I use a piece of foam as my tripod. My camera is a Casio Exilim 7.2Mp. It's a nice little camera and it wasn't terribly expensive.

So to take the actual pics, I set the camera to "macro" focus mode (for close up things) and set the self timer to 2 seconds. I shine the lights into the tent (at an angle, shown in the photo) and position the mini, then put the camera on the foam support. I elevate the camera if needed (seen in the photo is a small box under the foam to raise it up a bit.) Press the shutter button and get your hand out of there. Two seconds is enough time for the shaking from the button press to be absorbed by the foam, so the pics come out fairly clear.

After the pic is taken, I use Gimp (free image processing software) to clip and sometimes alter the image for color levels.

Take Cover! Step 1: Basecoating

Tonight was priming and the most basic basecoating. Getting a consistent color as your base makes everything else so much easier. Even with Citadel Foundation paints you should use more than one coat. Do not be tempted to put the paint on thicker to get better coverage. Thicker paint dries unevenly, and the acrylic binder creates a rough texture. You really want to be painting as close to the original surface as possible. Paint should not be used as gap filler!

So, colors.... VGC = Vallejo Game Colors (a brand of paint)

Primer: Rust-o-leum gray automotive primer. This stuff behaves better than any primer from a miniature company I've ever used, and it's only $4 a spray can.

Foundation "Mechrite Red" for the armor. The initial coat had a purplish twinge that I see a lot with thinned out reds. Just keep laying on thin coats and the real color will develop.

Reaper Master Series "Bone Shadow" for the shoulder pads, purity seals and chest icon. It's a bit less yellow then GW's Graveyard Earth, and I really like the bone color combo of Bone Shadow, VGC Khaki, VGC Bonewhite, Reaper Linen White.

VGC Black.... chaos black? I don't know. The label rubbed off the bottle.

GW Foundation "Calthan Brown" for the ground on the base.

GW Foundation "Tallarn Flesh" for the skin. Again, multiple layers were very important here.

Now that I have a good base to work from I'll try and get some highlight/shade done tomorrow. This thing has to be done by Friday night at 11:59 PM or no possibility of Blood Ravens swag for me!

Monday, March 16, 2009

Modeling Complete... Painting Next!

My entry for the "take cover" contest is coming along quite nicely, if I do say so. It looks almost exactly like I envisioned it looking before painting began.

And now it's time to paint.


Couple more things.... my friend with the legal problems mentioned in a previous post got an adjournment of his sentencing. Basically, he hired a new attorney and there were so many things not quite normal about his trial that the judge is delaying sentencing by a month to give his new attorney time to act on all the issues.

Last thing: children + keyboard = broken keyboard. My space bar only works from the left hand side now. The right hand side is stuck in such a way that it won't depress correctly. No fewer than nine different children have used this computer at some point since it's purchase, so I'm not terribly surprised that something like this would eventually happen.

Sunday, March 15, 2009

Switching Gears and Taking Cover

I've put my own army on hold for the rest of the week so I can power through an entry for the "Take Cover!" painting competition over at The Painting Corps. Since the subject of the competition is Blood Ravens, I don't see how I can pass this up. The theme is cover, and I found myself repositioning a marine to get the most dramatic pose possible. I'm hoping I can take this from vision to product in less than a week. The contest time frame was a month, but I just found out about it. I suppose I should have some sense of hush-hush about what I'm doing, but it someone out there can see what I'm doing and do it better than me in less than a week then they deserve to win.

I worked on the Librarian some more too. He's coming along nicely but I see more and more and more areas I need to fix on him. He's really going to take a long time tweaking the little details. I'll probably get him to the 95% mark and call it good for now, which actually means call it good forever.

Friday, March 13, 2009

Terminator Librarian WIP and thoughts on salt masking

I've been a big fan of this mini since GW first released it, and now I'm finally painting it! Like everything else I've done lately he's Blood Ravens. I will get to 1500!

I'm not sure I really like the face yet. I was going for a strange glow effect with completely white eyes, but I can't tell if it looks other-wordly or just unnatural. Thoughts?

I tried something new for the bone coloration, which is on the chest emblem and head crest. Instead of Bleached Bone (or VGC Bonewhite) I went with a mix of VGC Khaki mixes with a little Reaper linen white. Final highlights are entirely linen white. The highlights on the red sash is a mix of red gore and reaper leather white. Reaper has such an interesting line of white variants, and I love the way they interact with other colors.

I've been following giganticdark's WIP thread on the CoolMiniOrNot forum, and it's been amazing. One of the techniques that I'd like to try is the salt masking, but I think I'm going to develop a variant using Vallejo masking medium. Maybe if I toothbrush spray the masking onto the mini then glaze over the dried mask it will have roughly the same effect as the salt mask. Since I don't like to haul out the airbrush a lot (and especially because Ann Marie is probably going to want her airbrush back one of these days) I'd like to come up with a similar effect that can be brushed on.

Monday, March 09, 2009

Dreadnought w/ TL Autocannons

I've had a thing lately for converting vehicle weapons from the new Space Marine codex that don't have any official bitz available locally. Sorry for the pic. I should have taken it mid-conversion with better light.

In any case, the new Dreadnought can replace the Multi-Melta arm with a twin-linked Autocannon, and another option to to replace the Dreadnought close combat weapon arm with a twin-linked Autocannon. Of course I thought, "what if I replace both arms with TL AC's!" The Black Reach Dread is inexpensive enough to chop up without the twinge of "I just chopped a $40 model up" regret that comes with modding the regular Dread.

The conversion is a few Woodland Scenics styrene tubes (3/32" and 5/32") nested to make the barrels. The Multi-Melta arms had an obvious place to attach the autocannon. For the CCW arm, cut off the CCW and glue a bit of the cut off Multi-Melta barrel to the front of the arm at the same location as the other arm. Use some epoxy putty to build up the arm to the same general shape as the other arm. Privateer Press' P3 modeling putty cures harder than green stuff, and can be filed to the crisp lines that look good in applications like this. I can't remember where the ammo boxes on the outside came from... just regular rhino/razorback accessory sprue I think. I filed off the hinges to try and make it look more like a magazine and less like "box glued to the side of an arm." By the way, I use these same tubes to make Ork Big Shootas by drilling holes in the larger tubes as cooling, and putting the smaller diameter tubes inside as the barrel. It looks pretty good, and will give some of my deffcoptas a different weapon option.

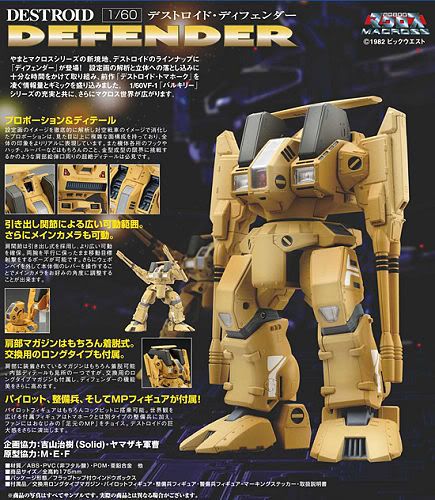
So back to the Dread... other than looking a little too much like a Macross Defender Destroid, what good is this thing? It gets four shots, twin linked, with 48" range. With BS4 and twin linked you aren't going to miss much. With a Venerable's BS5 you are pretty much never going to miss (okay, well, you'll miss 1 in 36 shots statistically.) So what are four S7 AP4 shots good for? The only thing that comes to mind is Ork Nobs in heavy armor. Wounding on a 2+ with no armor save... but they'd still get a "feel no pain" roll if they had a Dok in the unit. A Predator might take a glancing hit or two. A Dread will probably take at least a glancing hit. Against heavy infantry I don't think autocannons would be as effective as an assault cannon. Both wound on 2+ against T4 and assault cannons get rending.

So... now that I have the thing converted, what should I use it against?

Thursday, March 05, 2009

Devastator Squad in Rhino - worth it?

I've been contemplating this for a few days... would it be worth parking a Devastator squad in a Rhino for protection?

Pros:
  • Rhino's armor of 11 makes them impervious to bolter fire.
  • Possibility of 12" emergency move if needed
  • Repair possible if Rhino immobilized
  • Vehicle and squad can target independently
  • Not significantly expensive (cheaper than extra marine + heavy bolter)
  • Potential for two Storm Bolters
  • Likely that entire squad would survive vehicle exploding
Cons:
  • Only two models can shoot from fire points
  • Points could be spent on additional long range weapons
  • High strength fire magnet
So for a mere 175 points you get 5 Devastators with 2 missile launchers in a Rhino armed with two Storm Bolters and a Hunter Killer missile. For that same cost you could get a 5 Devastator squad with 2 Lascannons and a missile launcher.

Have you done this? How did it work for you?

Wednesday, March 04, 2009

Golden Demon Completion Meters!

They're back! I decided to improve them a little this year with a bit of JavaScript. For your technological edification I present it here. It could be easily inserted into Blogger or probably any other. Feel free to use/steal as you see fit. Just remember your old pal Mike when you're rich and famous!

Next up: more Blood Ravens!

Tuesday, March 03, 2009

Games Day: No Atlanta? No L.A.?!

Maybe I'm the last person to realize this.... on GW's Community and Events page for Games Day, only Chicago, Baltimore and Toronto are listed for Games Day 2009. At first I was thinking, "They'll probably add the other two later" until I saw this sentence:
There will be three Games Days in North America this year, one in Baltimore, Toronto, and Chicago.
That's it. Only three. No more Atlanta. No more Baltimore. Plus, the tickets are now $25 with the option to buy the exclusive miniature for another $15. Between lower ticket costs and fewer venues I can only come to the conclusion that Games Day attendance has been weak. Chicago seemed lighter in 2008 than it did in 2007, but that may be because I wasn't quite so overwhelmed by newbishness in 2008. I also wonder about the geography of the Games Day locations. Sure I'm glad Chicago is still hosting, but what are people in CA going to do? Or FL? Or WA?

What I'm really hoping is that this is not evidence of deep financial problems at GW. I like GW's miniatures and I like their games. I'm not fond of everything they do as a company, but I don't want them to go bankrupt that's for sure.